
Leaking hatches are a common issue on boats, especially in the late fall and early winter. Everyone who owns an older boat for any period of time will likely have to deal with a leaky hatch at some point.
While it might be tempting to try and stop the leak by adding covers, tape, silicone, and even a tarp, a permanent fix usually involves rebedding the hatch. While it might seem intimidating, it’s actually a fairly quick and easy job if you know how to go about it.

A version of this article originally appeared in Good Old Boat Magazine.
Is it time to rebed a hatch?
While a fairly straightforward project, you obviously don’t want to rebed a hatch if you don’t have to. Ask yourself:
Is the leak persistent?
Sometimes, at the end of a very dry and sunny season, or if the boat has been kept out of the water, you may discover tiny new leaks after the first rainfall. This is likely because the boat has dried out, resulting in small voids around thru-deck fittings. With the first rain, the deck may swell slightly to fill the tiny voids.
If this is the case, you may be able to delay rebedding.
Where is the leak coming from?
Is the leak coming from between the fiberglass and the hatch? If so it’s likely that the bedding compound has failed and is letting water through.
If the water is coming from the hatch seal (between where the hatch meets the hatch frame) there may be a problem with the hatch itself. Thoroughly inspect the seal for damage and replace it if necessary.


Materials you’ll need to rebed a hatch
Assuming you don’t need to replace the hatch glass, seal, or the hatch itself, fixing a leaky hatch can be very inexpensive. You’ll need:
- A long-handled square shafted slotted screwdriver
- A crescent wrench
- A hammer
- A pry bar (or two)
- Sika Flex 291 (preferably white to match your deck)
- Paper towel and acetone for cleanup
If you suspect that the hatch is affixed to the deck with rusty, seized screws, you may also need:
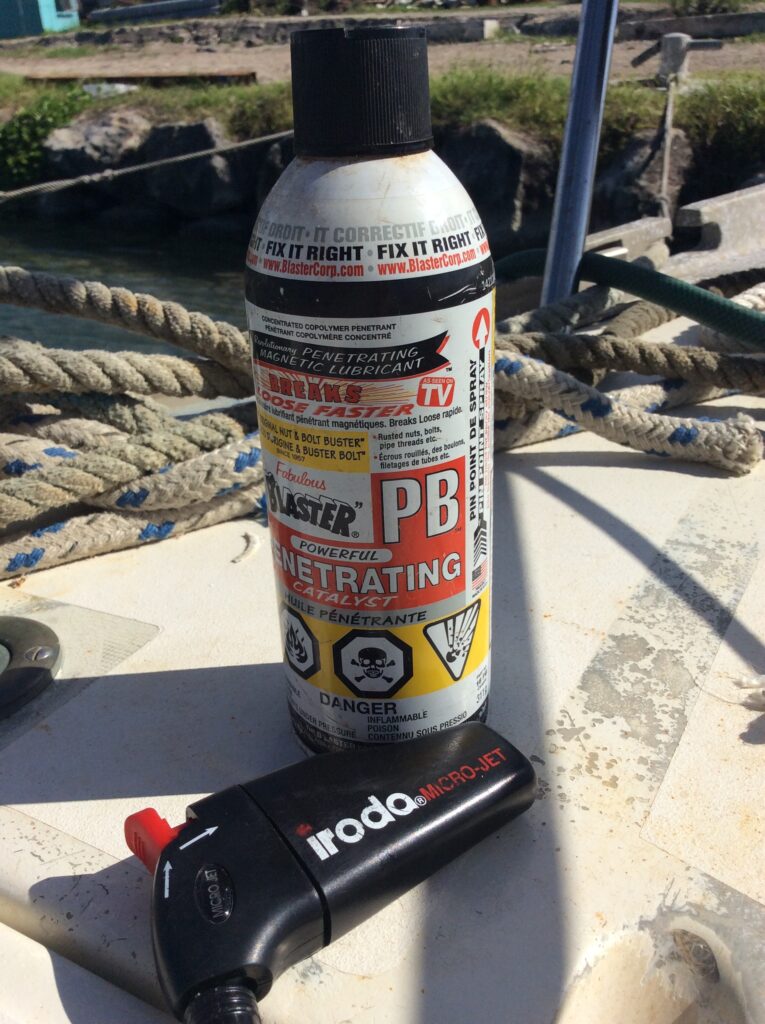
- A penetrating oil like WD-40 or PB Blaster
- A micro-jet torch
How to rebed a leaky hatch
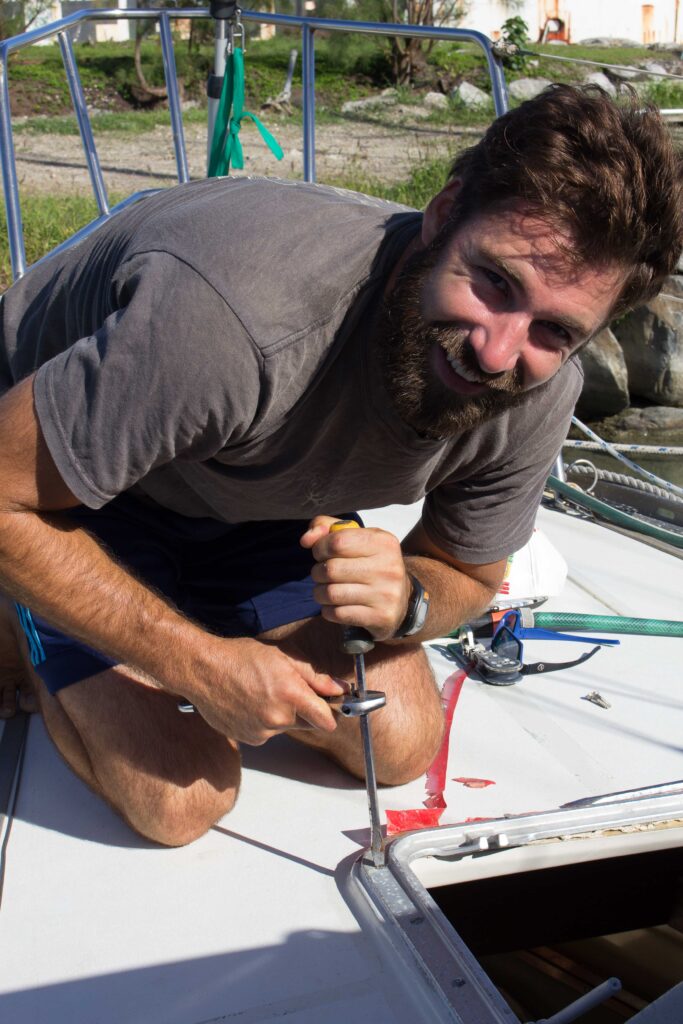
Step 1. Remove fasteners
Remove screws with a long-handled square-shafted screwdriver and put them in a safe place. Hatch screws are usually corroded and difficult to budge. We learned a great little trick for removing a rusty screw from Paul Hrabowski at Ocean Rigging & Hydraulics to make the whole process relatively pain-free (see sidebar: How to remove a rusty screw ).

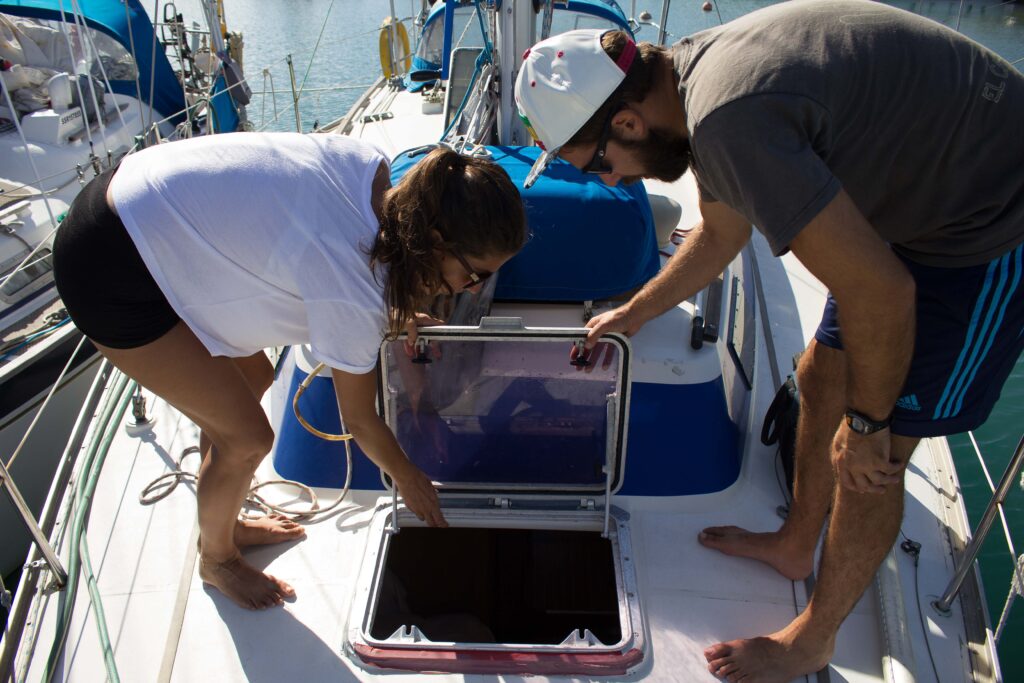
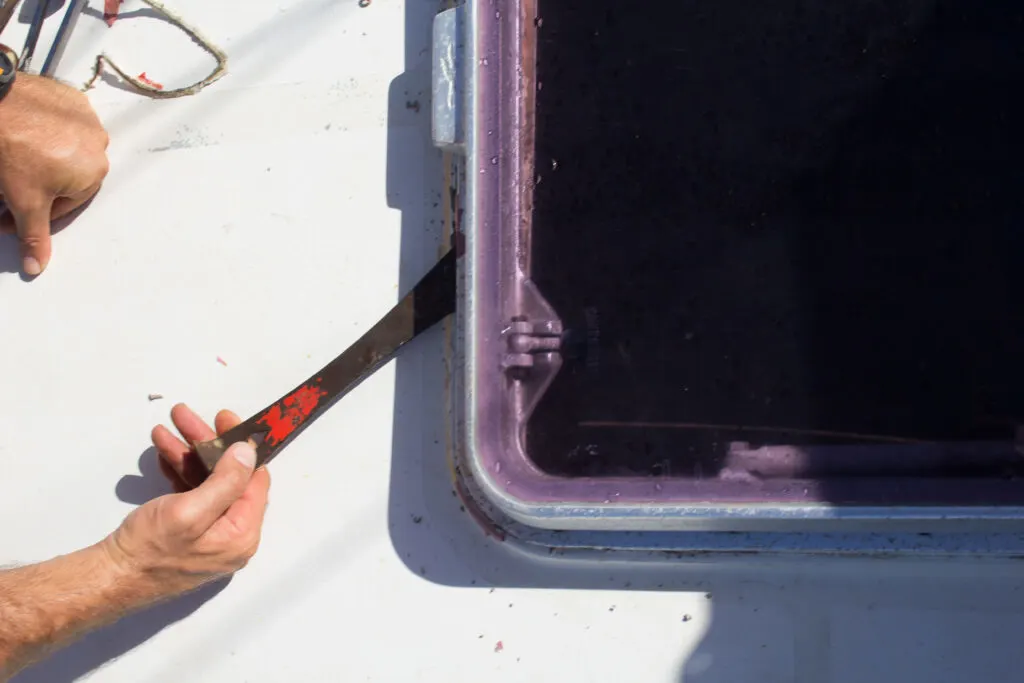
Step 2. Pry up the frame
Place the pry bar between the fiberglass deck and the hatch frame and gently pry. If you can’t wedge the pry bar under the hatch, tap the right-angled side of the pry bar with a hammer to drive it in. Slowly work your way around the hatch, to break the hatch frame free from the old sealant.

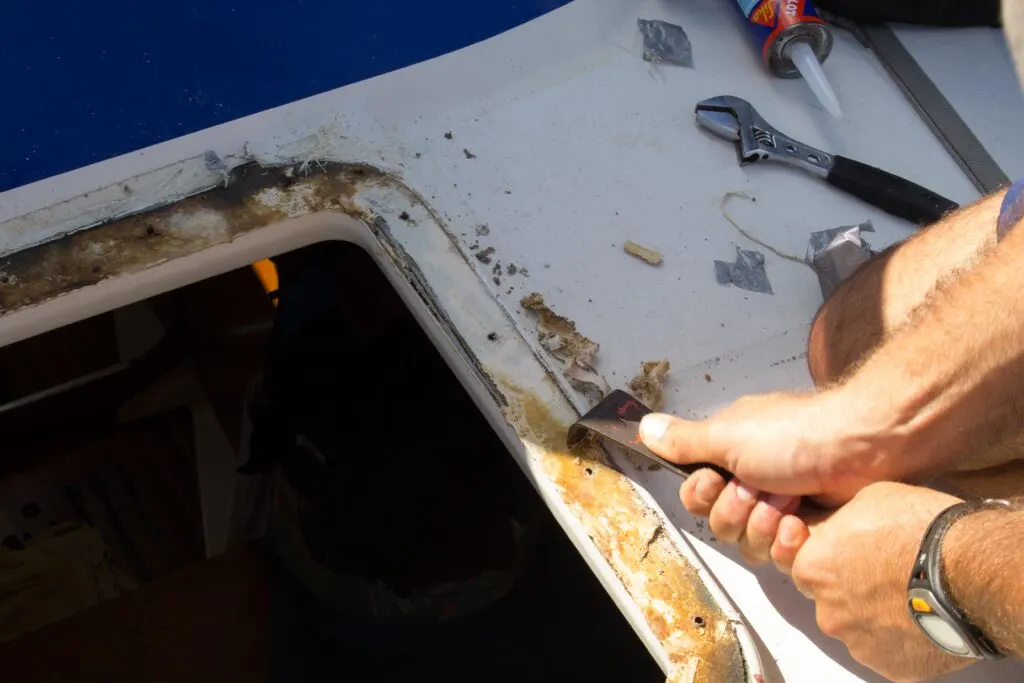
Step 3. Remove the old sealant
With the hatch removed, the fun really begins. Scrape away any only sealant using whatever tool best gets the job done. We’ve found prybars and chisels usually do the trick.

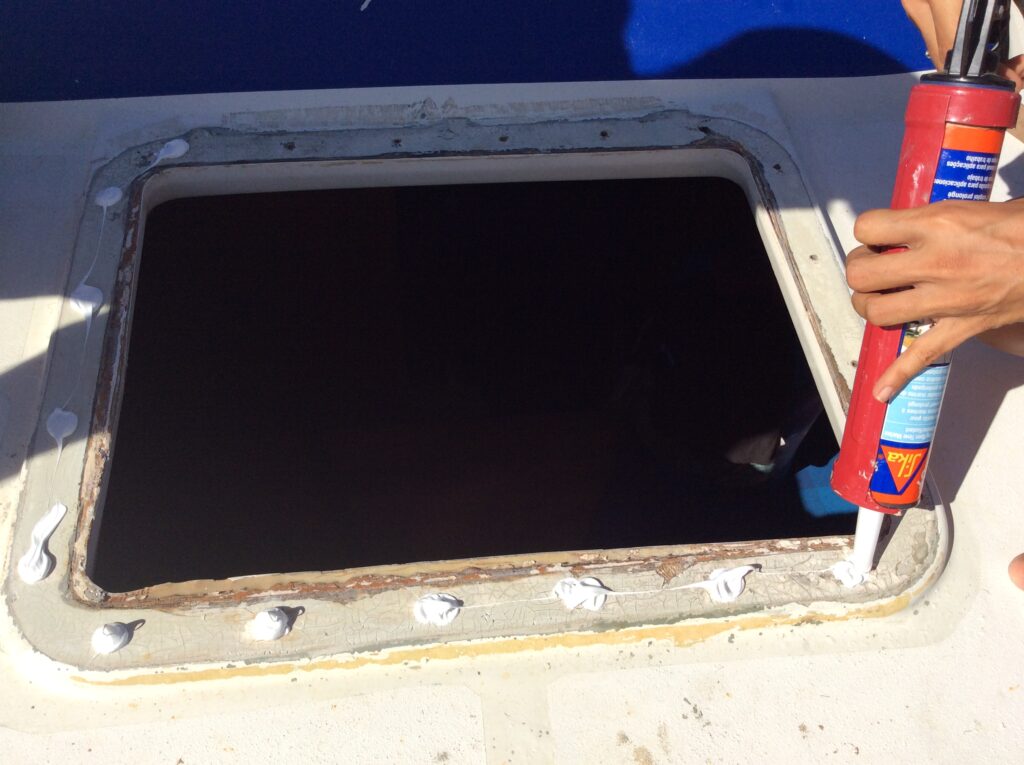
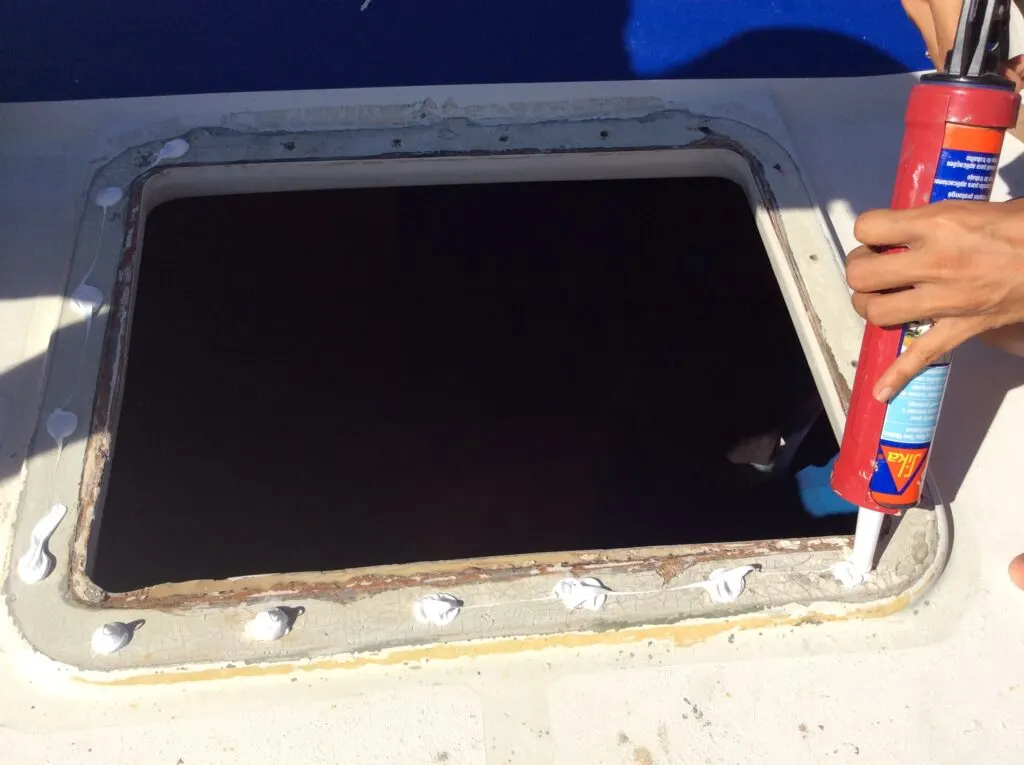
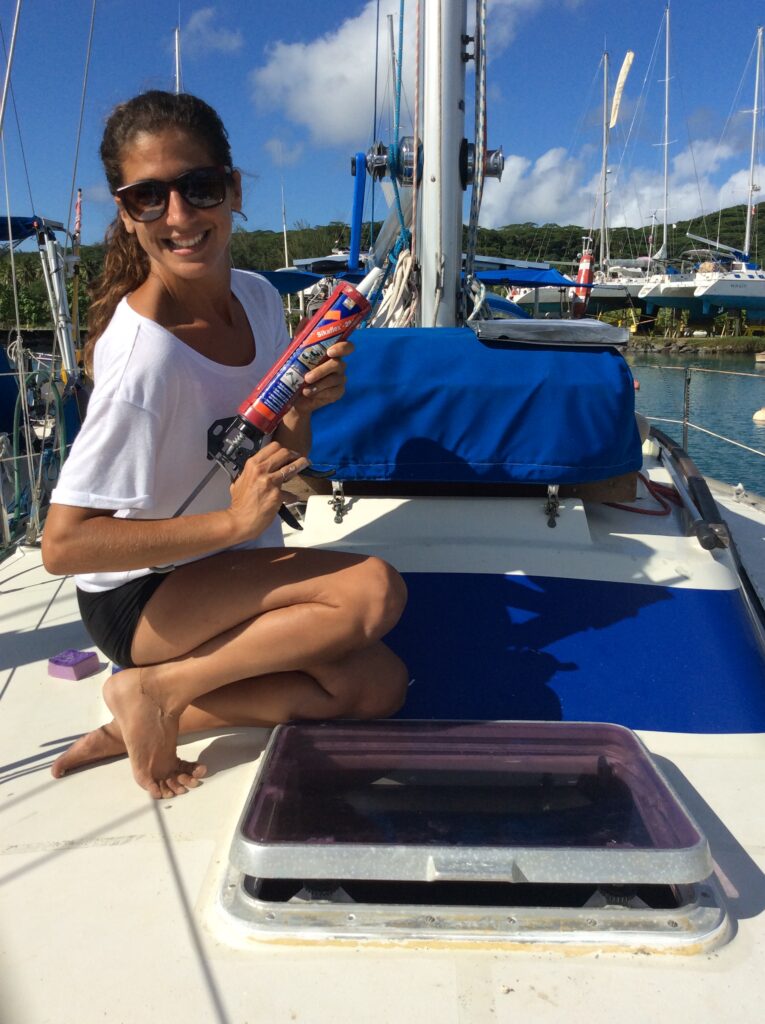
Step 4. Apply new sealant
Apply the new Sika Flex by filling the screw holes and running a line around the area where you’ll seat the hatch. Don’t be shy with the Sika Flex. When done correctly, it should squish out the sides when you reaffix the hatch. Too little sealant and you’ll risk a small gap where water will inevitably find a way through.
Step 5. Install fasteners
Replace your screws and mop up the bulk of the excess Sika Flex with paper towel. You can use a bit of acetone to clean up any remaining Sika Flex.
Congratulations! You’ve banished your hatch leak. Now you can get back to sailing.

Fiona McGlynn is an award-winning boating writer who created Waterborne as a place to learn about living aboard and traveling the world by sailboat. She has written for boating magazines including BoatUS, SAIL, Cruising World, and Good Old Boat. She’s also a contributing editor at Good Old Boat and BoatUS Magazine. In 2017, Fiona and her husband completed a 3-year, 13,000-mile voyage from Vancouver to Mexico to Australia on their 35-foot sailboat.